Hi
I recently came across an interesting requirement that I thought would be worth sharing here. Yet again I will be working with Entity Lists, and some implementations will be used from previous posts.
Business Requirement:
- Display list of records in the Portal
- Allow users to download a document with record details (including child entities)
- Document should be (preferably) Word format
- The document should also be available in D365
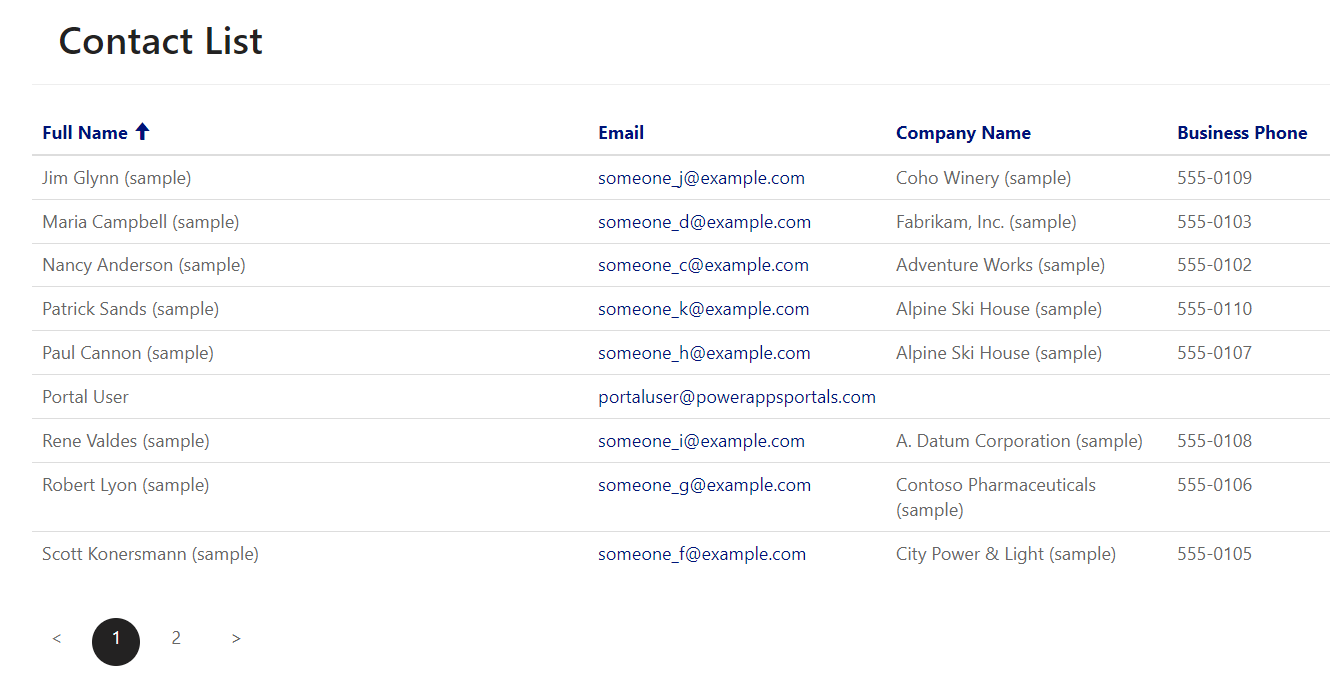
Before we dive into the details, here is a sneak peek of what will be achieved by the end of this post:

To achieve this, I will use the following components:
- Web File with the Word icon
- Web Page and Entity List for the Contact entity
- Entity List actions
- View record details
- Run Workflow (to generate the Word Document)
- Entity Permissions
- Custom entity (Application) with the following relationship:
- Contact 1:N Application
- Word Template against the Contact record, displaying contact details and a list of Applications
- Workflow to set generate Word Template against the Contact record
- CSS customizations to display my workflow actions as icons
- JavaScript code to dynamically create the download button
Implementation
My overall approach for this will be using as much as possible existing D365 features, I won’t write any custom code in D365, only client-side code in the Portals will be necessary.
- Web File:
As I want my Entity List to display a Word Icon, I am creating a Web File and uploading the icon from IconFinder.com
- Web Page/CSS:
The only customization I am doing around my Web Page is the CSS to display the entity list actions as icons, you can view more details on how to achieve this in the following post: https://oliverrodrigues365.com/2020/05/10/power-apps-portals-adding-icons-to-entity-list-action-buttons-via-css/.
I want to use a Word icon for my “Generate Document” workflow action in my entity list, so I am adding one more class to my CSS, this is to set the height and position of my image (you wouldn’t need this if you were using icons within the bootstrap/glyphicon):
.view-grid .dropdown.action .dropdown-menu .workflow-link .entitylist-icon>img {
    max-height: 18px;
    margin-top: -9px;
}- Entity List:
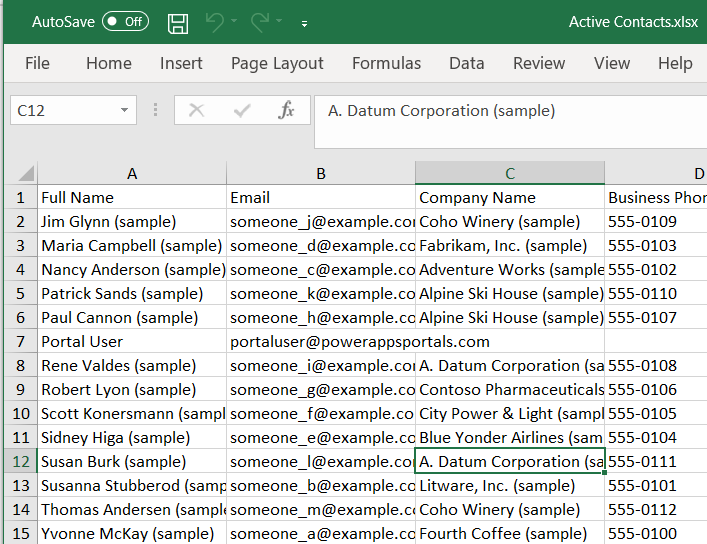
My Entity List is simply pointing to the Active Contacts view, and I am assigning the following Actions against it:
- Details action redirecting to a new Web Page to display record details
- Workflow action triggering my custom workflow to generate the document, on the Button Label I am adding my custom CSS class and image:
<span class="fa fa-fw entitylist-icon" aria-hidden="true">
    <img src="icon-word.png"/>
</span>- Entity Permissions:
The Word document will be generated as a Note attached to my Contact record in D365, for this reason we need to have an entity permission for the Note entity, this is a child entity permission against my Contact entity permission, for more details on parent/child entity permissions please refer to the following documentation: https://docs.microsoft.com/en-us/powerapps/maker/portals/configure/assign-entity-permissions
- D365 Application Entity / Contact Entity
I have a custom entity called Application, with some very simple fields for this demo such as ID, Status, Type and Created On.
Another customization I am making is adding a custom field (Text/URL) in my OOB Contact entity to store the URL of my document, I am calling this “Generated Document URL”.
Finally make sure this URL field is available in your view being displayed on the Portal, in my case the Active Contacts view. Don’t worry, we will hide the column via JavaScript, but this will be important on a later stage.
- Word Template
I am using the OOB Word Template feature to generate my document. What I like about this is that we can generate the document manually via D365 or through a workflow, which is perfect for my scenario. For more details on how to create the Word Template please refer to the following: https://docs.microsoft.com/en-us/power-platform/admin/using-word-templates-dynamics-365.
My template will display a logo image, the Contact name and e-mail and a list of the existing Applications.
- Workflows
We need two sync workflows to achieve our need. Here I will describe each of the workflow steps:
Generate Word Document
Sync Workflow
Trigger: On-Demand
Entity: Contact
Scope: Organization
Steps:
 - Perform Action: SetWordTemplate (pass the contact record and set the Word Template created as actions parameters)

The SetWordTemplate is an OOB action that creates a note against the record with the generated Word Document.
A note record in your Portal can be accessed via the following URL pattern: <portalurl>/_entity/annotation/<note guid>, so now we need to generate the URL against the Contact record. For this I am creating the below workflow:
Set Contact Generated Document URL
Sync Workflow
Trigger: Record is created
Entity: Note
Scope: Organization
Steps:
 - Validate if the Regarding field of the note is a Contact
 - Validate if the File Name is <your word template name> (you can make better validations, I am going for simple ones for this demo)
 - Now we need the note GUID, to avoid code I am using the D365 Workflow Tools solution: https://github.com/demianrasko/Dynamics-365-Workflow-Tools/blob/master/docs/GetRecordID.md but you could also write your own custom code to retrieve the record GUID
 - The next step is to update the related Contact record with the URL pattern + Note GUID. All we need here is the relative path, no need for the Portal root URL (as this might change between environments or other reasons)

- Entity List JavaScript:
At this point we have the core of our development done. If you navigate to your Web Page you should have the Word icon to generate your document, and once triggered, the URL column from your view, once empty, should get populated with the document URL, if you click that URL you should be able to download your document.
Now we need to add a JavaScript logic, attached to the Entity List Load event, that will perform the following actions:
- Hide URL column
- For each row:
- Get the URL from the “Generated Document URL” attribute
- If this contains data, create dynamically an element in the same structure as the other elements
- Append new element to the workflow links so it will be the last action
The following JavaScript code can be placed in the Entity List custom JavaScript section:
$(document).ready(function() {
    SetDownloadButton();
});

SetDownloadButton = function() {

    var entityList = $(".entitylist.entity-grid").eq(0);

    entityList.on("loaded", function() {

        // hide url column
        entityList.find("table thead th").eq(4).hide();
        entityList.find("table tbody tr").each(function() { $(this).find("td").eq(4).hide(); });

        entityList.find("table tbody > tr").each(function(index, value) {
            var tr = $(this);

            var documentUrlAttribute = tr.find('td[data-attribute="ollie_generateddocumenturl"]');

            if (documentUrlAttribute.length > 0) {

                var documentUrl = $(documentUrlAttribute).attr("data-value");

                var downloadElement = "";
                downloadElement += "<li>";
                downloadElement += "    <a href='" + documentUrl + "' target='_blank'>"
                downloadElement += "        <span class='fa fa-download fa-fw' aria-hidden='true'/>";
                downloadElement += "    </a>";
                downloadElement += "</li>";

                var generateWord = tr.find(".dropdown-menu");
                generateWord.append(downloadElement);
            }
        });
    });
};
Now after refreshing the cache and your Web Page you should see the below behavior:

- Caching Issues?
We all know the Portals have some caching issues, but this shouldn’t be an issue with the above implementation. For any actions triggered by the Portals, the cache is automatically refreshed for that record, as in our scenario we are using sync workflows, the cache gets refreshed within the same transaction.
Conclusion
My example was specific to generate a Word document using a Word Template in D365, but this approach could be used for several other requirements where you have a workflow updating the main record in real-time, and appending a dynamic link to anything on your entity list.
Have you ever had a similar requirement? Please comment below with how you implemented it.
If you find this post useful feel free to like and share it.