Posted in Entity List, JavaScript/jQuery Plugins, Power Apps Portals

Power Apps Portals – Remove default value on Lookup Modal

Following up on a comment from another post: Custom Lookup filter, I feel like this deserves its own dedicated article.

A Lookup column in a Basic Form/Advanced Form in Power Apps Portals is represented in a Web Page by a web control that contains a modal associated to it. This modal gives us the ability to select and filter records for that entity.

If your Lookup column is empty, when clicking on the magnifying glass, the Portals will automatically select the first record:

This behaviour might not be what you are looking for, so in this article I wanted to share a simple JavaScript code that will untick the default value, unless the lookup column already contains data:

$(document).ready(function () {

    var modalList = $("#cr285_customerlookup_lookupmodal").find(".entity-lookup").find(".entity-grid").eq(0);
    modalList.on("loaded", function () {
        var lookupValue = $("#cr285_customerlookup").val();
        if (!!!lookupValue) {
            var selected = modalList.find("table tbody > tr.selected");
            $(selected).find("td[data-th=Select] > span[role='checkbox']").click()
        }

    });
});

Also worth mentioning that this is not removing the record/row from the table within the modal. It is simply deselecting the record.

I hope this helps with your Power Apps Portals implementation.

Update December 2022

I just heard from Microsoft that this has now been fixed and shouldn’t be an issue. This articles is still relevant for injecting code to the lookup window, so I will keep the article here.

Posted in Entity List, JavaScript/jQuery Plugins, Power Apps Portals

Power Apps Portals – Entity List: Making the entire row clickable

When creating a page containing an Entity List (or just List) in Power Apps Portals, it is very common to add a details page so users can drill-down to the records details.

The list is represented as below example:

By default, the first column contains the link to the details Web Page as well as the action menu on the right dropdown.

In this post, I will share two options for JavaScript/jQuery code to make the entire row clickable.

Solution 1 – Making each cell clickable

In this example, we will perform the following:

  • Loop through the list, retrieving the URL for record details each row
  • Then we will loop through each individual cell, and attach an <a> element to represent the link
  • The code also needs to ignore the TD containing the dropdown (optionally this can be removed)
SetLinkAllCells = function () {

    var entityList = $(".entitylist.entity-grid").eq(0);

    entityList.on("loaded", function () {
        entityList.find("table tbody > tr").each(function (index, tr) {
            
            var primaryColumn = $(tr).find('td')[0];

            /// or retrieve column by name
            /// var primaryColumn = tr.find('td[data-attribute="name"]');

            var url = $(primaryColumn).find("a")[0].href;
            console.log("URL: " + url);
            if (!!url) {
                $(tr).find('td').each(function (index, td) {
                    /// ignore action menu / dropdown
                    if ($(td).attr("aria-label") == "action menu")
                        return;

                    var cellValue = $(td).text();
                    /// clear td value 
                    $(td).text("");
                    var newElement = '<a href="' + url + '" class="details-link has-tooltip" data-toggle="tooltip">' + cellValue + '</a>';
                    $(td).append(newElement);
                });
            }
        });
    });
};

Solution 2 – Making the table row clickable

In this example, we will perform the following:

  • Loop through the list, retrieving the URL for record details each row
  • Attach a new function to the click event of the row, redirecting the user to the URL
  • Remove the action menu, as this will also be triggered on the row click event
  • Set the cursor to pointer for better UX
SetLinkAllRow = function(){
    var entityList = $(".entitylist.entity-grid").eq(0);

    entityList.on("loaded", function () {
        entityList.find("table tbody > tr").each(function (index, tr) {
            
            var primaryColumn = $(tr).find('td')[0];

            /// or retrieve column by name
            /// var primaryColumn = tr.find('td[data-attribute="name"]');

            var url = $(primaryColumn).find("a")[0].href;
            console.log("URL: " + url);
            if (!!url) {
                $(tr).css("cursor","pointer")
                // remove menu dropdown
                $(tr).find('td[aria-label="action menu"]').remove();

                $(tr).click(function(){
                    window.location.href = url;
                });
            }
        });
    });
};

Now all we need is to use the preferred method:

$(document).ready(function () {
    //SetLinkAllRow();
    // or
    //SetLinkAllCells();
});

Conclusion

Each method might suit different needs, you might also consider ignoring cells that already contain a clickable value, for example e-mail address or phone number columns.

Also if your action menu contains several actions, such as delete / start a workflow, etc, the solution might need a bit of a tweak.

In general, this can be a quick win to improve UX in your Power Apps Portals implementation.

Posted in Entity List, Power Apps Portals

Power Apps Portals – Loading large data in Entity Lists

Entity Lists are a powerful feature from Power Apps Portals to quickly expose data from Dataverse. But loading a large set of data can lead to a terrible user experience if the page keeps loading for a long period of time.

In this article, I will show a trick on how to basically not load the data until the user has applied a filter to the list.

Data and Entity List setup

For this example, I have the following setup:

  • Account table with over 1000 records;
  • Web Page showing an Entity List;
  • Entity List pointing to the Account table, Page Size = 500 and Metadata Filter enabled on the Account name.

When opening my page, this is taking and average of 9 seconds to render, which can be quite a lot and depending on the internet connection this could be even worse.

Entity List – Metadata Filter

Now it’s time for a hidden trick with regards Metadata Filtering. We can actually pre-inject values to the URL and this will be applied before loading the list itself. The format must be the following:

?mf=0=firstvalue%261=secvalue%262=thirdvalue…

Let’s breakdown and understand the meaning of that:

  • ? this just separates the main URL from its parameters, basic web stuff here;
  • mf= means the Metadata Filter, and whatever follows is the value of the mf parameter;
  • 0 means the index of the filter;
  • =firstvalue assigns the first filter value to “firstvalue”;
  • optionally if you have multiple filter attributes:
    • %26 this is the ASCII code for the char &, so basically it is appending multiple parameters;
    • 1 means the index of the second filter;
    • =secvalue assigns the second filter value to “secvalue”;
    • and you can keep going if you want…..

In my example, I only have only filter, so let’s see what happens when I try to load the page by adding the parameter in the url:

Power Apps Portals is reading my URL and automatically assigning a value to the first filter, all this happens at the server-side level and the page is loaded super quick (less than a second).

That’s great, but how to add the custom parameters by default? For that you can check my previous post where I extend the Web Link table to take additional URL parameters: https://oliverrodrigues365.com/2021/03/01/power-apps-portals-adding-parameters-in-menu-links/

This is what my Web Link looks:

I decided to generate a GUID value as I would never have an account with that name, but you could use anything you want here.

Clear the value in Metadata Filter

We are almost there, final step is to clear the value that is present in the Filter on the load of the page, this can be achieved by the following JavaScript/jQuery code:

  $(document).ready(function(){
    ClearFilter();
  });

  function ClearFilter(){
    var params = new URLSearchParams(window.location.search);
    var mf = params.get("mf"); // metadata filters
    if(mf === "0=0eaf2b2b-be3a-4c3c-9e52-1c03431c0d9f"){
      $("#0").val("");
      var listAccounts = $(".entitylist.entity-grid").eq(0);
      listAccounts.on("loaded", function () {
        listAccounts.find(".view-empty.message").text("Please enter a filter criteria to find an Account record!")
      });
    }
  };

Let’s explore what the code is doing:

  • Retrieve the URL Parameters;
  • Retrieve the mf parameter;
  • Check the value for my 0 indexed filter. This is the same value as entered previously in my Web Link – note that you could use anything here, as long as they match;
  • If it’s a match, clear the value for the element with id 0by default, metadata filters are rendered being assigned the id the same as the filter index;
  • Via Entity List, we can setup the message for empty list, but not for “record not found”. This would be possible to change via Content Snippet, but that would be applied to every Entity List in the Portals. For this reason I am changing the message in my list via JavaScript to indicate that the user should enter a filter criteria.

Conclusion

Loading a large set of data is a very common scenario and with very little code we can enhance the user experience by forcing them to use the filter.

Have you every solved this using a different approach? Please post on the comments the strategy you took.

Posted in Menu / Navigation, Power Apps Portals

Power Apps Portals – Adding Parameters in Menu Links

My friend Franco Musso recently wrote a blog post where he shows a few options on what you can do with Custom URL parameters: https://francomusso.com/custom-url-query-parameters-for-your-power-apps-portals.

That blog post has inspired me to write this article, but in here I will be talking about a step before. I will show how to customize the Web Link entity table along with the Header Web Template and get the custom query parameters added once the menu is loaded.

First step is to add a custom attribute column to the Web Link table. I will call it Parameters and add to the form in my Model-Driven App (the format of this should be param1=value,param2=value…..):

Now we need to change the existing Header Web Template to add those parameters in the menu. The changes here should be made where the link <a> element is rendered (circa line 37 in the OOB code):

Here is the liquid code highlighted and an explanation of the changes:

{% if link.cr984_parameters %}
    {% assign linkParams = link.cr984_parameters | split: "," %}
{% endif %}
href="{{ link.url | escape }}{% if linkParams %}?{% for lp in linkParams %}{{ lp }}{% unless forloop.last %}&{% endunless %}{% endfor %}{% endif %}"
  • if my custom column cr984_parameters is not empty, assign an array object (comma separated values) ;
  • now when setting the href property, I am adding a ? and then looping through my parameters array, appending a & until the last position of the array;

As per my snapshot above, I am setting the Home Web Link parameters as param1=hello,param2=world.

Now once cleared the cache and just by hovering the mouse over the Home menu link, this is what I see in my browser:

The same code might need to be applied where the sublinks are rendered, but in my example I will just to it for the main Web Link (parent).

Now we can use the parameters in our page (via Liquid or JavaScript). Just for an example, I will render my parameters via Liquid in my Home Web Page:

Conclusion

Not a lot of people know this, but once making customization to the Portals data model, those changes are reflected in the Liquid objects and can be accessed via code. This is a great trick to extend Power Apps Portals capabilities. Unfortunately if you do these changes you will be limited to using the Portal Management App as this wouldn’t reflect in the Portal Studio.

Possibilities here are endless, please make sure to check out Franco’s post to see other examples of using custom parameters in your Power Apps Portals URL.

Posted in JavaScript/jQuery Plugins, Power Apps Portals

Power Apps Portals – Custom Lookup filter

A common requirement for Power Apps Portals is to add dynamic filters when we open a lookup modal. Unfortunately there is no OOB way to achieve this. It is important to state here that the Portal relies on the Lookup View from your D365/Dataverse, so if you need a static filter you can always change that view:

In this post I will show a customization using client-side code to filter the data presented on the lookup modal. But before that, I’d like to share an article by a community champion that uses a different method: https://www.dancingwithcrm.com/custom-lookup-filtering-powerapps-portal/ by Oleksandr Olashy.

The idea of the article above is to render the lookup as a dropdown, and then use JavaScript/Web Templates to perform a query and finally re-populate the options in the dropdown element.

That approach will probably be enough for most scenarios, but what if you still need to show the Lookup modal as below?:

Here are a few reasons you might want to display the Lookup modal:

  • If your list is a very long list, a dropdown might not be the best experience for the user;
  • You might want to use the search;
  • You might want to display multiple columns;
  • If you have a subgrid and have an action for Associate record, this will always open the lookup-modal.

In my example, I have an Account lookup on the Contact profile form, and the filter I want to do here is hiding certain records if the current user is not an Administrator. I will also add a flag on the Account entity to mark records that should be hidden.

Here is my Account data with no filters via Advanced Find search:

Now I will add the following JavaScript code to the Profile Web Page:

$(document).ready(function () {

    var list = $("#parentcustomerid_lookupmodal").find(".entity-lookup").find(".entity-grid").eq(0);
    list.on("loaded", function () {
        
        // hide "Admin Only" column
        list.find("table thead th").eq(2).hide();
        list.find("table tbody tr").each(function () { $(this).find("td").eq(2).hide(); });

        var isAdmin = "{{ user | has_role: 'Administrators' }}";
        console.log("is admin: " + isAdmin);
        if (isAdmin == "false") {
            list.find("table tbody > tr").each(function () {
                var tr = $(this);
                var adminOnly = $(tr).find('td[data-attribute="cr42c_adminonly"]').attr("data-value");
                if (adminOnly == "true") {
                    tr.remove();
                }
            });
        }
    });
});

If I open the lookup again via Portals, these are the options that I am presented with:

Let’s explore the JavaScript code:

  • I am finding the modal associated with the id parentcustomerid_lookupmodal and injecting a function to the OnLoad event;
  • Optionally, I am hiding the Admin Only column, as I want that column to be for technical purposes only;
  • Using Liquid, I am checking if the user contains the Administrators role;
  • Finally I am looping through the list and checking the value for my Admin Only column, and completely removing the <tr> element in case it’s not supposed to be shown.

Here are a few other business scenarios for which this approach might be applicable:

  • Dynamic filter based on a parent record (performing a query via oData or FetchXML to retrieve the related records);
  • Filter records on an Associate modal – for this we just need to change how to assign the list variable:

From:

var list = $("#parentcustomerid_lookupmodal").find(".entity-lookup").find(".entity-grid").eq(0);

To:

var list = $(".associate-lookup").find(".entity-grid").eq(0);

Conclusion

I really wish we were able to select which view to display in Portal lookups, as well as set them dynamically. Perhaps Microsoft will add this feature in the future, but in the meantime this JavaScript code is a good solution for filtering lookup controls.

I hope this tip comes in handy for your Power Apps Portals project.

Posted in Entity List, JavaScript/jQuery Plugins, Power Apps Portals

Power Apps Portals – JavaScript Tip #03 – Load Edit modal after record creation

Hi

A very common business requirement I see is to create a record as well as related (1:N) records within the same page. By design, in Power Apps Portals (as well as Dynamics 365 / CDS / Dataverse) we need first to create the main/parent record to be able to create any related records. There are a few different ways to implement this, for example:

  • Web Forms (or Entity Forms with redirect) – having the initial step to the main record creation, and then moving to another step/page with the subgrid
  • Web API – the new Web API allows us to create multiple records in the same request, but requires a good bit of custom development

The above might be enough for most scenarios, but I want to explore here a different one that is very common. Let’s say we have an Entity List (or subgrid) with both Create and Edit actions enabled using an Entity Form modal instead of opening a Web Page – how can we fix this problem then?

We can achieve this requirement by adding a JavaScript on the Entity List (or Entity Form containing the subgrid if that’s your case). The idea of the JavaScript code is to check if there is any created record on every time the list is loaded, and force the Edit Entity Form to open, this will allow the user to enter the related records without having to click on the record. Let’s take a look at how this will look to the end-user:

Technical Implementation

I will explain here, at a high-level, my implementation:

  • I have two global variables to help in my code
    • existingRecordList – this is an array that I will store the existing list items whenever loaded
    • firstLoad – this is a simple variable to control when the page is being loaded for the first time
  • Then I inject a function (CheckNewRecord) to the onload event of my Entity List
  • These are the steps of my main function (CheckNewRecord):
    • Initiate the existingRecordsList in case this is the first load
    • Compare the size between existingRecordsList and Entity List records
    • I am creating a new temporary array to avoid conflicting with my global array
    • For each item of my Entity List:
      • Add the record ID to the temporary array
      • Ignore if this is the first time loading or if we already found which one is the new record
      • Check if the ID doesn’t exist in the global array
      • If it doesn’t exist, it means we found the new record, so we can store that in a separate variable (newRecordId) as well as marking that we already found the new record
    • Reload the global array with the temporary array; this is necessary for the next loads of the Entity List
    • If we found a new record, we need then to open the Edit modal/Entity Form
      • Via jQuery I am finding the element with the ID of the new record, and triggering the click event for the “details-link” class
    • Finally set the firstLoad control variable to false
var existingRecordsList;
var firstLoad = true;

$(document).ready(function() {

    var list = $(".entitylist.entity-grid").eq(0);
    list.on("loaded", CheckNewRecord);
});

function CheckNewRecord() {

    var list = $(".entitylist.entity-grid").eq(0);
    var newRecordFound = false;
    var newRecordId;

    // first load
    if (firstLoad) {
        existingRecordsList = [];
    }

    if (existingRecordsList.length != $(list).find('table tbody tr').length) {

        var tempRecordList = [];

        $(list).find('table tbody tr').each(function() {
            var id = $(this).attr("data-id");
            tempRecordList.push(id);

            if (!firstLoad && !newRecordFound && existingRecordsList.indexOf(id) < 0) {
                newRecordId = id;
                newRecordFound = true;
            }
        });
        // reload global variable with items in temp list
        existingRecordsList = tempRecordList;

        if (newRecordFound && !!newRecordId) {
            // open edit modal
            var newRecordElement = $(list).find("[data-id='" + newRecordId + "']");
            $(newRecordElement).find("a.details-link").eq(0).trigger("click");
        }
    }
    firstLoad = false;
}

Conclusion

The idea of this post was more to show tricks that we can do with an Entity List/Subgrid by applying JavaScript code. This is not limited to opening the Edit Entity Form after the creation, but really anything you might need to perform via JavaScript once a record is created and you don’t want to re-load the page.

This works pretty well with an Entity List/Subgrid containing a small number of records. But be mindful that in case of a large list, this might not work as the new record might not be in the current page.

Posted in Power Apps Portals, Web API

Power Apps Portals – Going beyond with Portals using Web API

Hi

Recently I’ve made a presentation at the Dublin user group on the new Power Apps Portals Web API. In this post I would like to share the slide deck and code used.

I haven’t done any post on the Web API, and the main reason is that I find Microsoft documentation pretty solid on this topic (and I am not a big fan of Microsoft’s documentation for new products).

You can check the official documentation on the Web API here: https://docs.microsoft.com/en-us/powerapps/maker/portals/web-api-overview

Why do we need a Web API?

Currently in Power Apps Portals, we can retrieve CDS data programmatically by using oData or FetchXML, but we have no way to perform insert/update operations against CDS data. The only ways to achieve these operations are through Entity Forms / Web Forms (there are alternative techniques but I won’t go into detail on these).

I have seen several business requirements that would need to perform operations without having an Entity Form associated, let me give you a few examples:

  • Editable Grid
  • Bulk delete within an Entity List
  • Bulk workflow trigger within an Entity List
  • Mark a Case or Notification record as read
  • Insert/Update records on a page being rendered via Liquid Template

Basically with the new Power Apps Portals Web API all those requirements will now be possible to achieve. Basically the Web API will open the doors for many possibilities.

The editable grid

During my presentation, I created an editable grid to be used against the Account entity, let’s take a look at how it looks:

I want to share here the code used in my presentation, but note that there might be a few requirements necessary that I won’t be exploring in this post. At a high-level, this is what is required:

  • Enable Web API via Site Settings (for both Account and Contact entities);
  • Create Entity Permissions (for both Account and Contact entities);
  • Create Web Template with Web API wrapper provided by Microsoft;
  • I have a custom CSS loaded with very simple definitions just to render my custom grid;
  • I have a “loading” gif just to give a better UX while the operation is happening

Okay, now I can talk about the code responsible for rendering my editable grid, as well as perform the Web API operations:

  • I am extending the OOB Layout 1 Column, and overriding the block main, this is just for rendering my content;
  • Now I have a fetch for the Account entity, which I am retrieving the Account Name, Primary Contact and telephone number;
  • I am adding a button responsible for the “New” account – you can see that I am assigning the NewRecord function to the button (we’ll go through that later);
  • Now I start rendering the table representing the editable grid itself, and just to simplify things, I am assigning an ID to each individual cell using the format (<account guid><_attribute name>). This will make it easier to retrieve the values later on, but you could achieve this in other ways as well;
  • For each row, I am adding a “Remove” and “Update” button, assigning a JavaScript function as well

Now we can talk about the JavaScript functions:

  • NewRecord() – This function creates a new line in the table, assigning a new GUID for the (to be created) Account. Here the remove button calls a different function, that won’t be calling the API, only removing the record from the table, and finally the button for create, which will obviously create the Account in the CDS;
  • NewGuid() – This function simply generates a new GUID;
  • CreateRecord(accountId) – This function is responsible for creating the Account and, along with it, it also creates a new Contact record in the same API request call. Finally, it refreshes the page so the remove and update functions are loaded correctly;
  • UpdateRecord(accountId) – This function updates only the Account Name and Telephone, I am not too bothered with the Contact for the sake of this demo;
  • RemoveUnsavedRecord(accountId) – This just removes a row without going through the API;
  • RemoveRecord(accountId) – This function calls the DELETE API method and removes the row from the table
{% extends "Layout 1 Column" %}
{% block main %}

{% include "OR Web API Wrapper Web Template" %}

{% fetchxml accountFetch %}
    <fetch version="1.0" output-format="xml-platform" mapping="logical" distinct="false">
        <entity name="account">
            <attribute name="name" />
            <attribute name="primarycontactid" />
            <attribute name="telephone1" />
            <attribute name="accountid" />
            <order descending="false" attribute="name"/>
        </entity>
    </fetch>
{% endfetchxml %}

    <div>
      <button type="button" class="btn btn-primary new-record btn-sm my-0 glyphicon glyphicon-plus" onclick="NewRecord()"></button>
      <table id="accountTable" class="table table-responsive-md table-striped text-center">
        <thead>
          <tr>
            <th class="text-center hidden">Account Id</th>
            <th class="text-center">Name</th>
            <th class="text-center">Primary Contact</th>
            <th class="text-center">Telephone</th>
            <th class="text-center"></th>
          </tr>
        </thead>
        <tbody>
        {% for acc in accountFetch.results.entities %}
            {% assign accountId = acc.accountid %}
          <tr id={{ accountID }}>
            <td class="hidden" contenteditable="true">{{ accountId }}</td>
            <td contenteditable="true" id="{{ accountID }}_name">{{ acc.name }}</td>
            <td contenteditable="true" id="{{ accountID }}_contactName">{{ acc.primarycontactid.Name }}</td>
            <td contenteditable="true" id="{{ accountID }}_telephone">{{ acc.telephone1 }}</td>
            <td>
              <button type="button" class="btn btn-danger btn-sm my-0 glyphicon glyphicon-remove" onclick="RemoveRecord('{{ accountId }}')"></button>
              <button type="button" class="btn btn-success btn-sm my-0 glyphicon glyphicon-ok" onclick="UpdateRecord('{{ accountId }}')"></button>
            </td>
          </tr>
        {% endfor %}
        </tbody>
      </table>
    </div>

<script>

function NewRecord(){

    var guid = NewGuid();
    var newLine = '';
    newLine += '<tr id=' + guid + '>';
    newLine += '    <td class="hidden" contenteditable="true">' + guid + '</td>';
    newLine += '    <td contenteditable="true" id="' + guid + '_name"></td>';
    newLine += '    <td contenteditable="true" id="' + guid + '_contactName"></td>';
    newLine += '    <td contenteditable="true" id="' + guid + '_telephone"></td>';
    newLine += '    <td>';
    newLine += '        <button type="button" class="btn btn-danger btn-sm my-0 glyphicon glyphicon-remove" onclick="RemoveUnsavedRecord(\'' + guid + '\')"></button>';
    newLine += '        <button type="button" class="btn btn-success btn-sm my-0 glyphicon glyphicon-ok" onclick="CreateRecord(\'' + guid + '\')"></button>';
    newLine += '    </td>';
    newLine += '</tr>';

   $("#accountTable").append(newLine);
   $("#" + guid + "_name").focus();
};

function NewGuid(){
    var dt = new Date().getTime();
    var uuid = 'xxxxxxxx-xxxx-4xxx-yxxx-xxxxxxxxxxxx'.replace(/[xy]/g, function(c) {
        var r = (dt + Math.random()*16)%16 | 0;
        dt = Math.floor(dt/16);
        return (c=='x' ? r :(r&0x3|0x8)).toString(16);
    });
    return uuid;
}

function CreateRecord(accountId){
    
    $("#loading").fadeIn();

    var accountName = $("#" + accountId + "_name").text();
    var telephone = $("#" + accountId + "_telephone").text();
    var contactName = $("#" + accountId + "_contactName").text();
    var contactFirstName = "";
    var contactLastName = "";

    if(!!contactName){
        contactFirstName = contactName.split(" ")[0];
        
        if(contactName.split(" ").length > 1)
            contactLastName = contactName.substr(contactName.indexOf(" ") + 1);
    }

    webapi.safeAjax({
		type: "POST",
		url: "/_api/accounts",
		contentType: "application/json",
		data: JSON.stringify({
			"accountid" : accountId,
            "name": accountName,
            "telephone1" : telephone,
            "primarycontactid":
            {
                "firstname": contactFirstName,
                "lastname": contactLastName
            }
        }),
		success: function (res, status, xhr) {
            $("#loading").fadeOut();
            alert("The record has been created successfully.");
            location.reload();
		},
        error: function(){
            $("#loading").fadeOut();
        }
	});
};

function UpdateRecord(accountId){

    $("#loading").fadeIn();

    var accountName = $("#" + accountId + "_name").text();
    var telephone = $("#" + accountId + "_telephone").text();

    webapi.safeAjax({
        type: "PATCH",
        url: "/_api/accounts(" + accountId + ")",
        contentType: "application/json",
        data: JSON.stringify({
            "name": accountName,
            "telephone1" : telephone
        }),
        success: function (res) {
            $("#loading").fadeOut();
            alert("The record has been updated successfully.");
        },
        error: function(){
            $("#loading").fadeOut();
        }
    });
};

function RemoveUnsavedRecord(accountId){
    
    if(!!accountId){
        $("#"+ accountId).remove();
    }    
};

function RemoveRecord(accountId){
    
    $("#loading").fadeIn();
    if(!!accountId){
        webapi.safeAjax({
            type: "DELETE",
            url: "/_api/accounts(" + accountId + ")",
            contentType: "application/json",
            success: function (res) {
                $("#"+ accountId).remove();
                $("#loading").fadeOut();
                alert("The record has been deleted.");
            },
            error: function(){
                $("#loading").fadeOut();
            }
        });
    }    
};

</script>

{% endblock %}

Can I use the Web API in production?

The Web API is currently in preview, and the general message is that it shouldn’t be used in Production environments. In my personal opinion, this feature is in good shape and shouldn’t have major changes until it reaches General Availability. I also doubt that Microsoft would cancel the rollout for this.

In other words, I would use it in Production, just keep in mind that you may have to re-factor some code in case of any changes from Microsoft.

Here is the slide deck I used in my presentation:

Posted in JavaScript/jQuery Plugins, Power Apps Portals

Power Apps Portals – JavaScript Tip #02 – Set Attributes Read-Only

Hello and welcome to another JavaScript tip for Power Apps Portals.

In this post I will show you how to set attributes read-only in your Entity Form / Web Form.

A generic way to set an attribute as read-only would be the following:

$("#<attribute name>").attr("readonly", true);

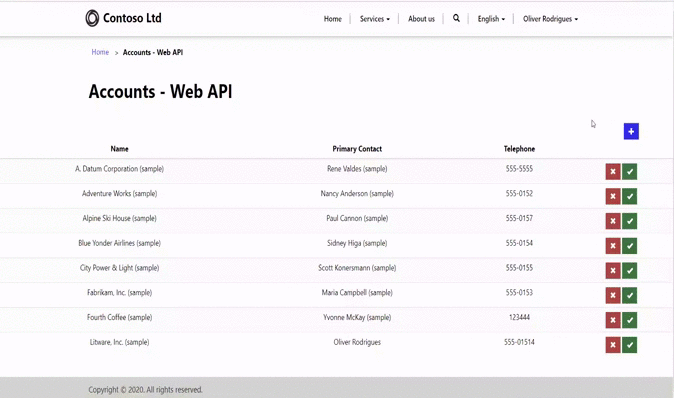
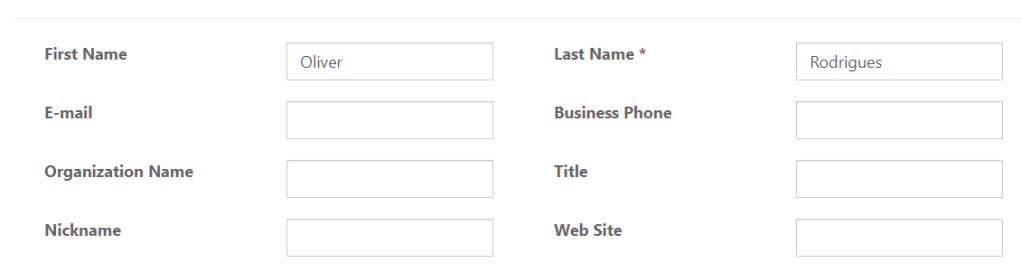
But depending on the datatype of your attribute, some additional changes to the HTML elements might be required. For example, a lookup field is normally rendered with a search button, or a datetime field has the datetime picker next to the input control:

Instead of re-writing the same code every time, let’s create some generic functions passing the field name as parameter, as well as a true/false flag to define if the field should be read-only. We will create a few different functions, according to the field datatype:

Set DateTime ReadOnly

SetDateTimeFieldReadOnly = function (fieldName, readOnly) {
    if (readOnly) {
        $('#' + fieldName).siblings("div.datetimepicker").find("input, .input-group-addon").attr("readonly", true);
        $('#' + fieldName).siblings("div.datetimepicker").find("input, .input-group-addon").css("cursor", "not-allowed");
        $('#' + fieldName).siblings("div.datetimepicker").find("input, .input-group-addon").on("mousedown", function (e) { e.preventDefault(); return false; });
    } else {
        $('#' + fieldName).siblings("div.datetimepicker").find("input, .input-group-addon").attr("readonly", false);
        $('#' + fieldName).siblings("div.datetimepicker").find("input, .input-group-addon").css("cursor", "default");
        $('#' + fieldName).siblings("div.datetimepicker").find("input, .input-group-addon").off("mousedown");
    }
};

Set Lookup ReadOnly

SetLookupFieldReadOnly = function (fieldName, readOnly) {
    if (readOnly) {
        $('#' + fieldName).siblings("div.input-group-btn").find("button").prop("disabled", true);
        $('#' + fieldName).siblings("div.input-group-btn").hide();
    } else {
        $('#' + fieldName).siblings("div.input-group-btn").find("button").prop("disabled", false);
        $('#' + fieldName).siblings("div.input-group-btn").show();
    }
};

Set Checkbox ReadOnly

SetCheckboxFieldReadOnly = function (fieldName, readOnly) {
    if (readOnly) {
        $('#' + fieldName).prop("disabled", true);
    } else {
        $('#' + fieldName).prop("disabled", false);
    }
};

Set Radio Button ReadOnly

SetRadioFieldReadOnly = function (fieldName, readOnly) {
    if (readOnly) {
        $('#' + fieldName).find("input[type='radio']").prop("disabled", true);
    } else {
        $('#' + fieldName).find("input[type='radio']").prop("disabled", false);
    }
};

Set Dropdown ReadOnly

SetDropdownFieldReadOnly = function (fieldName, readOnly) {
    if (readOnly) {
        $('#' + fieldName).attr("readonly", true);
        $('#' + fieldName).css("pointer-events", "none");
    } else {
        $('#' + fieldName).attr("readonly", false);
        $('#' + fieldName).css("pointer-events", "auto");
    }
};

We still need one more function to cater for any other datatype. This will be the main function that we will make the call and we need one additional parameter, representing the field datatype.

This function will validate the field type and call the appropriate function we created above (via switch case), finally having the generic read-only function in the default instruction:

Set Field ReadOnly Function

SetFieldReadOnly = function (fieldName, readOnly, type) {
    try {
        type = type.toLowerCase();

        switch (type) {
            case "date":
            case "time":
            case "datetime":
                SetDateTimeFieldReadOnly(fieldName, readOnly);
                break;
            case "lookup":
                SetLookupFieldReadOnly(fieldName, readOnly);
                break;
            case "checkbox":
                SetCheckboxFieldReadOnly(fieldName, readOnly);
                break;
            case "radio":
                SetRadioFieldReadOnly(fieldName, readOnly);
                break;
            case "dropdown":
                SetDropdownFieldReadOnly(fieldName, readOnly);
                break;
            default:
                if (!!readOnly) {
                    $("#" + fieldName).attr("readonly", true);
                    $("#" + fieldName).css("cursor", "not-allowed");
                    $("#" + fieldName).on("mousedown", function (e) { e.preventDefault(); return false; });
                } else {
                    $("#" + fieldName).attr("readonly", false);
                    $("#" + fieldName).css("cursor", "default");
                    $("#" + fieldName).off("mousedown");
                }
                break;
        }
    }
    catch (err) {
        console.error("Error SetFieldReadOnly: " + err.message);
        return;
    }
};

Now you can combine all JavaScript code above, saving as a .js file (and upload as a Web File), or a Web Template record, or a Content Snippet record, etc. Then refer to it in any Portal page, or even the Tracking Code Content Snippet (so it can be used in every page) – and that’s it, the functions are ready to be used in your Portals.

Posted in JavaScript/jQuery Plugins, Power Apps Portals

Power Apps Portals – Field Label Position

Hi,

In this post I will show you how to set the field label position within an Entity Form/Web Form in Power Apps Portals.

If you are familiar with Dynamics 365, you probably are aware that we can define which position to place a field label within a form. The positions available are:

  • Side: label and input control are positioned side-by-side
  • Top: label and input control are positioned as top-bottom

Unfortunately, Power Apps Portals ignores this definition and always renders your form as top-bottom positioning:

I will show you how to change this behavior to render your field label as side-by-side position. We can achieve this via JavaScript or CSS:

Via JavaScript/jQuery

If you need to set only for a specific form or perhaps specific section in your form, you can use the following jQuery function (just relace the sectionGeneral below for your section name):

$("table[data-name|='sectionGeneral']").find(".control").css("clear", "none");
$("table[data-name|='sectionGeneral']").find(".control").css("float", "right");

Via CSS

If you want to setup this behavior for every Entity Form/Web Form within your Portals, or perhaps for an entire Web Page, you can set it via CSS (you can place this in your .css file or the Web Page custom css field):

.section tbody tr td div.control{
    clear: none !important;
    float: right;
}

Now refresh your Portals Web Page and you will have the below rendered form (don’t forget to clear the cache):

Posted in Portal Management App, Power Apps Portals

Power Apps Portals – Script Error: One of the scripts for this record has caused an error…

Hi

This is a quick post that might help you in case you come across the below error message when using the Portal Management App within Power Apps Portals:

The first time I had this issue it took me a while to figure out what was happening. When viewing the error details, all I could see is that the Portals couldn’t run its OOB JavaScript (even though I hadn’t made any changes to it):

ReferenceError: Web resource method does not exist: adx.adx_webpage.loadResources
at Kl.execute (https://orgf67a233b.crm4.dynamics.com/uclient/scripts/app.js?v=1.4.1024-2006.4:1262:2548)
at https://orgf67a233b.crm4.dynamics.com/uclient/scripts/app.js?v=1.4.1024-2006.4:118:20532
at o (https://orgf67a233b.crm4.dynamics.com/uclient/scripts/app.js?v=1.4.1024-2006.4:289:133)
at $._executeIndividualEvent (https://orgf67a233b.crm4.dynamics.com/uclient/scripts/app.js?v=1.4.1024-2006.4:118:20508)
at $._executeEventHandler (https://orgf67a233b.crm4.dynamics.com/uclient/scripts/app.js?v=1.4.1024-2006.4:118:18113)
at Object.execute (https://orgf67a233b.crm4.dynamics.com/uclient/scripts/app.js?v=1.4.1024-2006.4:118:15469)
at O._executeSyncAction (https://orgf67a233b.crm4.dynamics.com/uclient/scripts/app.js?v=1.4.1024-2006.4:855:692)
at O._executeSync (https://orgf67a233b.crm4.dynamics.com/uclient/scripts/app.js?v=1.4.1024-2006.4:855:419)
at O.executeAction (https://orgf67a233b.crm4.dynamics.com/uclient/scripts/app.js?v=1.4.1024-2006.4:855:201)
at t.dispatch (https://orgf67a233b.crm4.dynamics.com/uclient/scripts/app.js?v=1.4.1024-2006.4:855:5545)

Fixing this problem is actually a lot easier than it looks. The root cause of this is actually an Ad Block extension that you might have installed in your browser. This issue happened to me with a few different extensions in multiple browsers.

The JavaScript used by the Portal Management App probably uses similar functions as common ads all over the internet, so it ends up blocked, causing several issues when trying to configure Portal data.

To fix this all you need is to either remove the extension, or add an exception based on the website URL. This may vary depending on the extension you have installed, in my case I have the AdBlock for Edge, so I can setup this exception using the option “Don’t run on pages on this site.”

Conclusion

If you have this problem, don’t stress, you didn’t do anything wrong – just follow the steps above and the error message will be gone!